
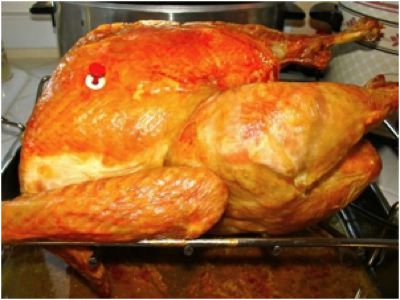
Basic Roast Turkey from Thawing to Table with Pictures
For me, Thanksgiving is usually the biggest feast of the year. Turkey, two kinds of stuffing so everyone will be happy, mashed potatoes, gravy, homemade bread, cranberry sauce, veggies, and either pecan pie or pumpkin pie.
So instead of offering a fancy schmancy recipe, I'm going to talk about turkey.
First, a word about brining. If you buy an organic turkey, or a local turkey, you will probably want to brine it. Read the label. If your turkey is Kosher or has been preserved with a solution, then you should not brine it.
That was probably great news for some people. If you're planning to brine your turkey, head over here.
For those of you who are not going to brine your turkey, here are the basics of roasting a turkey, from thawing to table.
THAWING
A turkey takes three days to thaw in the refrigerator. Take it out of the freezer on Sunday night or Monday morning. If you are reading this on Thanksgiving Day with a turkey on the counter that is frozen harder than rock, call 1-800-BUTTERBALL (1-800-288-8372). That's their hotline.
While I doubt that a government office would be open on Thanksgiving, you can also try the USDA Meat and Poultry Hotline number at 1-888-674-6854. It looks like they think you can cook a frozen turkey but that it takes longer. Don't do that without checking out their instructions in detail because I have no idea what happens to the giblets and neck that are frozen inside.
CRISPY SKIN TIP
(may be skipped)
If you particularly relish crispy skin, remove the turkey from the bag on Wednesday. Remove the giblets and neck (see below), rinse it, dry it, salt and pepper it, and allow it to continue thawing in the refrigerator uncovered for 24 hours before roasting.
If you forget to do that, it's okay. Your turkey will still turn out fine.
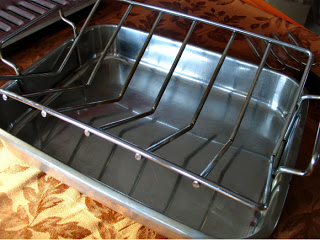
THE ROASTING PAN
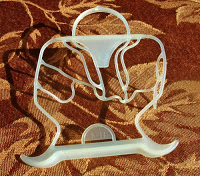
Turkey roasting pans come in all shapes and sizes. This is what I use. A pan with a roasting rack inside it.
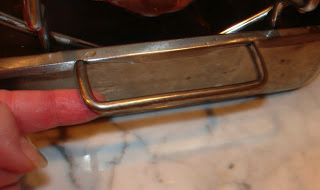
However, if you're shopping for one of these, buy the kind of pan that has handles that stand up on their own. It might be more complicated to store, but if the handles fall to the sides, it's impossible to get a grip on them when the pan is hot.
Or you can use this kind of roaster with a rack in it.

And in a pinch, you can even use the pan that came with your oven. They're not the best choice, but I've used them and everything worked out fine.

PREHEAT THE OVEN
If your family has gotten together in the kitchen at 3AM for the last thirty years to cook Thanksgiving dinner and your nana, mom, and Aunt Birdie insist that a turkey must be roasted low and slow for hours and hours, then don't fight them. Do it their way.
Or you can do it this way.
Depending on the size of your oven, you will most likely have to move the rack down to the next to bottom level.
Preheat the oven to 400 degrees.
GET READY
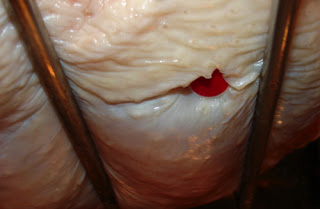
Most turkeys are packed with a gizmo that holds the legs together called a hock lock. Honestly, removing it might be the most difficult part of this whole process. There are several different styles in use, but the thing to note is that it has little wings to the left and the right that are wedged very firmly in your turkey.
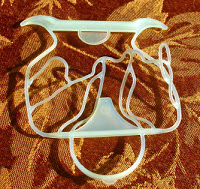
Take the end of the wing in your hand. Lift it toward the neck of the turkey and scoot it over onto the back. Repeat with other wing.
Depress the ends of the legs, one at a time, until you can free them from the gizmo. Now for the difficult part. You'll note that the little wings on the left and the right are curved (some are, some aren't). That means if you pull it straight toward you, it's only being lodged deeper in the meat. Push it away and try, if at all possible, to squeeze it together or tug it to one side then the other side until both sides are out.
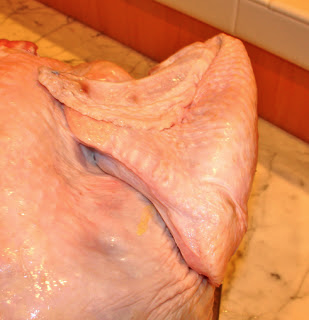
Whew! The rest is easy. Generally the neck will be found inside the cavity accessed between the legs. Sometimes the giblets are also there. If not, they are on the other end with a flap of skin holding them in place. Remove the neck and the giblets. I'm not going into gravy here, because that's a whole other thing. However, if you're cooking gravy, hold onto the neck and giblets because you'll need them. Not going there? Cook the giblets (not the neck) and chop them up for your dog. Don't feed them all at once. Give him or her a little over the next few days.
Rinse the turkey with cold water and pat dry.
Rub the exterior of the turkey with salt and pepper. Just pour a little into your hand and rub it on the turkey.
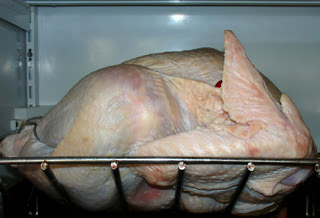
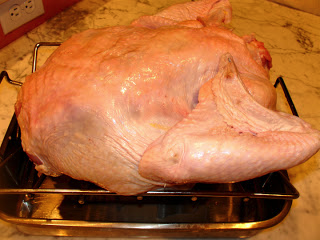
Turn the turkey onto its tummy. Breast side down.
If your turkey has a pop-up timer, be sure it's not wedged on your rack. You don't want it to be touching anything.
Slide turkey into oven. Set timer for 45 minutes. If you have a giant turkey that's over 16 pounds, set the timer for 1 hour.
When the timer goes off, remove the turkey from the oven.
Forget these.
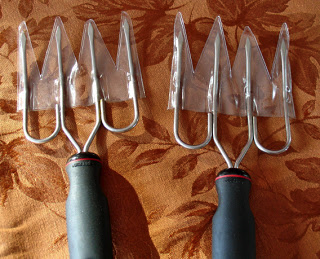
Put the turkey back into the oven. Be sure the side with the pop-up timer is visible.
Turn the temperature down to 375. (I often leave it at 400, and it still comes out fine.)
Set the timer for 45 minutes if it's a small turkey. Most turkeys will need at least another hour or hour and a half of cooking time or more. It's my theory that previously frozen turkeys take longer to cook than fresh turkeys. After 1 hour, watch the turkey. I usually set the timer for 10 - 20 minutes so I won't forget to check.
ABOUT THE POP-UP TIMER
Sometimes they work, sometimes they don't. Beware of removing the turkey from the oven too soon. It will look perfect before it's through cooking.
WHEN IS IT DONE?
The USDA says turkey should cook to 165 degrees.
Loads of recipes say to tent the turkey with aluminum foil until it's served. That guarantees non-crispy skin because it ends up steaming. Just let the turkey stand for ten to thirty minutes while you eat your soup, and then serve.
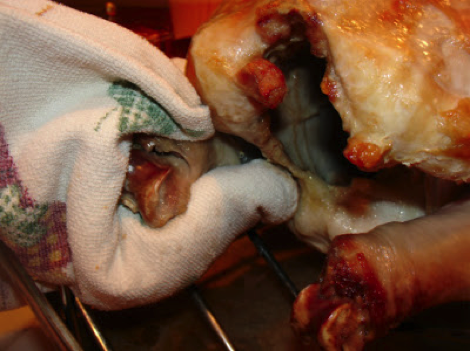
They make handy dandy weapons for murder mystery authors, but old kitchen towels are cheaper and provide a much better grip on turkeys.
Double two kitchen towels, one in each hand. Grasp the knob on the ends of the legs. Make sure no one is on the other side because hot liquid is going to come out. Lift and slowly roll the turkey forward (away from you). Let the juices drip into the pan. Now lift the turkey, move it toward you, and place it on the rack on its BACK.
Copyright 2008-2021 Krista Davis
All rights reserved.